
Now in android creating card views has gotten even more simpler. As with material design a new view was introduced through the support v7 library, called CardView. It can be used in many ways to display cards in android. For example, it can be used like an independent view to show floating search bar on top of the screen also it can be used to display cards in a list. In this Android CardView example we will discuss how this view can be implemented in a RecyclerView list.
Recently 5.1 version of android was released, with an update for support v7 library. This is important to know because it contained a minor update for RecyclerView package. In this tutorial of Android CardView we will also discuss how this can effect us.
Android CardView Tutorial
To start off lets understand what exactly Android CardView is? Its a new widget for Android, which can be used to display a card sort of a layout in android. As you may know Android material design is inspired from paper and ink concept. Mostly it displays views on top of each other, with shadows. In simple terms, Android CardView is such a view which has all material design properties, most importantly showing shadows according the elevation. The best part about this view is that it extends FrameLayout and it can be displayed on all the platforms of android since it’s available through the Support v7 library. Lets have a look at some of its properties:
1) CardView overlapping corners:
Java: setPreventCornerOverlap(boolean)
XML: cardView:cardPreventCornerOverlap
A unique property of Android CardView is that, it has rounded corners. The interesting part about this property is that, it clips the corners of content automatically. Unfortunately this property, as of now is not supported on devices running API 20 or low. Instead when an image covering the full CardView is displayed on these devices, a padding is added to the image to prevent the overlapping corners. To make the edges overlap this property can be used. In this case you may need to use an image with round corners. Also keep in mind this does not has an effect on API 21 and above as the clipping is automatically done.
2) CardView Content Padding:
Java: setContentPadding(int, int, int, int)
XML: cardView:contentPadding
Since when a card is displayed on screen, usually multiple views are added inside it. Fortunately Android CardView supports this unique property, through which the padding for CardView content can be set once and for all. Advantage of this property is that we don’t need to set margin or padding for each view inside the CardView individually to make it look good.
3) CardView Elevation:
Java: setCardElevation(float)
XML: cardView:cardElevation
This property defines the elevation of CardView. As you may know this one of the core concepts of Android material design. According to the elevation defined, Android system dynamically shows the shadow of any material on screen.
Android CardView Example
In this tutorial we would use a RecyclerView to show a list of CardViews. Since this tutorial is not about the working of Android RecyclerView, we would not be discussing the detailed working of RecyclerView. If you wish to learn in detail about it, please refer to this RecyclerView tutorial.
Lets have a look at the CardView xml, which I will be using in this tutorial.
<?xml version="1.0" encoding="utf-8"?>
<LinearLayout xmlns:android="http://schemas.android.com/apk/res/android"
              xmlns:card_view="http://schemas.android.com/apk/res-auto"
              android:layout_width="match_parent"
              android:layout_height="wrap_content"
              android:orientation="vertical">

    <android.support.v7.widget.CardView
        android:id="@+id/card_view"
        android:layout_width="fill_parent"
        android:layout_height="100dp"
        android:layout_gravity="center"
        android:layout_margin="5dp"
        card_view:cardCornerRadius="2dp"
        card_view:contentPadding="10dp">

        <RelativeLayout
            android:layout_width="fill_parent"
            android:layout_height="fill_parent">

            <TextView
                android:id="@+id/textView"
                android:layout_width="wrap_content"
                android:layout_height="wrap_content"
                android:layout_alignParentTop="true"
                android:textStyle="bold"/>

            <TextView
                android:id="@+id/textView2"
                android:layout_width="wrap_content"
                android:layout_height="wrap_content"
                android:layout_below="@+id/textView"
                android:layout_marginTop="10dp"/>
        </RelativeLayout>
    </android.support.v7.widget.CardView>


</LinearLayout>
Before starting off don’t forget to include these dependencies in your app gradle.
dependencies {
    compile 'com.android.support:appcompat-v7:25.1.0'
    compile 'com.android.support:cardview-v7:25.1.0'
    compile 'com.android.support:recyclerview-v7:25.1.0'
}
Next please a look at activity layout, which shows the RecyclerView:
<RelativeLayout xmlns:android="http://schemas.android.com/apk/res/android"
                xmlns:tools="http://schemas.android.com/tools"
                android:layout_width="match_parent"
                android:layout_height="match_parent"
                tools:context=".CardViewActivity">

    <android.support.v7.widget.RecyclerView
        android:id="@+id/my_recycler_view"
        android:layout_width="match_parent"
        android:layout_height="match_parent"
        android:scrollbars="vertical"/>

</RelativeLayout>
In this Android CardView Example, we will use this object for supplying the data to adapter:
package com.truiton.cardviewexample;

public class DataObject {
    private String mText1;
    private String mText2;

    DataObject (String text1, String text2){
        mText1 = text1;
        mText2 = text2;
    }

    public String getmText1() {
        return mText1;
    }

    public void setmText1(String mText1) {
        this.mText1 = mText1;
    }

    public String getmText2() {
        return mText2;
    }

    public void setmText2(String mText2) {
        this.mText2 = mText2;
    }
}
The activity below shows the CardView list:
package com.truiton.cardviewexample;

import android.os.Bundle;
import android.support.v7.app.AppCompatActivity;
import android.support.v7.widget.LinearLayoutManager;
import android.support.v7.widget.RecyclerView;
import android.util.Log;
import android.view.View;

import java.util.ArrayList;


public class CardViewActivity extends AppCompatActivity {

    private RecyclerView mRecyclerView;
    private RecyclerView.Adapter mAdapter;
    private RecyclerView.LayoutManager mLayoutManager;
    private static String LOG_TAG = "CardViewActivity";

    @Override
    protected void onCreate(Bundle savedInstanceState) {
        super.onCreate(savedInstanceState);
        setContentView(R.layout.activity_card_view);

        mRecyclerView = (RecyclerView) findViewById(R.id.my_recycler_view);
        mRecyclerView.setHasFixedSize(true);
        mLayoutManager = new LinearLayoutManager(this);
        mRecyclerView.setLayoutManager(mLayoutManager);
        mAdapter = new MyRecyclerViewAdapter(getDataSet());
        mRecyclerView.setAdapter(mAdapter);

        // Code to Add an item with default animation
        //((MyRecyclerViewAdapter) mAdapter).addItem(obj, index);

        // Code to remove an item with default animation
        //((MyRecyclerViewAdapter) mAdapter).deleteItem(index);
    }


    @Override
    protected void onResume() {
        super.onResume();
        ((MyRecyclerViewAdapter) mAdapter).setOnItemClickListener(new MyRecyclerViewAdapter
                .MyClickListener() {
            @Override
            public void onItemClick(int position, View v) {
                Log.i(LOG_TAG, " Clicked on Item " + position);
            }
        });
    }

    private ArrayList<DataObject> getDataSet() {
        ArrayList results = new ArrayList<DataObject>();
        for (int index = 0; index < 20; index++) {
            DataObject obj = new DataObject("Some Primary Text " + index,
                    "Secondary " + index);
            results.add(index, obj);
        }
        return results;
    }
}
Next lets have a look at the main class where RecyclerView adapter is defined. This class shows how to include an Android CardView widget in a RecyclerView:
package com.truiton.cardviewexample;

import android.support.v7.widget.RecyclerView;
import android.util.Log;
import android.view.LayoutInflater;
import android.view.View;
import android.view.ViewGroup;
import android.widget.TextView;

import java.util.ArrayList;

public class MyRecyclerViewAdapter extends RecyclerView
        .Adapter<MyRecyclerViewAdapter
        .DataObjectHolder> {
    private static String LOG_TAG = "MyRecyclerViewAdapter";
    private ArrayList<DataObject> mDataset;
    private static MyClickListener myClickListener;

    public static class DataObjectHolder extends RecyclerView.ViewHolder
            implements View
            .OnClickListener {
        TextView label;
        TextView dateTime;

        public DataObjectHolder(View itemView) {
            super(itemView);
            label = (TextView) itemView.findViewById(R.id.textView);
            dateTime = (TextView) itemView.findViewById(R.id.textView2);
            Log.i(LOG_TAG, "Adding Listener");
            itemView.setOnClickListener(this);
        }

        @Override
        public void onClick(View v) {
            myClickListener.onItemClick(getAdapterPosition(), v);
        }
    }

    public void setOnItemClickListener(MyClickListener myClickListener) {
        this.myClickListener = myClickListener;
    }

    public MyRecyclerViewAdapter(ArrayList<DataObject> myDataset) {
        mDataset = myDataset;
    }

    @Override
    public DataObjectHolder onCreateViewHolder(ViewGroup parent,
                                               int viewType) {
        View view = LayoutInflater.from(parent.getContext())
                .inflate(R.layout.card_view_row, parent, false);

        DataObjectHolder dataObjectHolder = new DataObjectHolder(view);
        return dataObjectHolder;
    }

    @Override
    public void onBindViewHolder(DataObjectHolder holder, int position) {
        holder.label.setText(mDataset.get(position).getmText1());
        holder.dateTime.setText(mDataset.get(position).getmText2());
    }

    public void addItem(DataObject dataObj, int index) {
        mDataset.add(index, dataObj);
        notifyItemInserted(index);
    }

    public void deleteItem(int index) {
        mDataset.remove(index);
        notifyItemRemoved(index);
    }

    @Override
    public int getItemCount() {
        return mDataset.size();
    }

    public interface MyClickListener {
        public void onItemClick(int position, View v);
    }
}
This would give an output screen with CardViews like these:
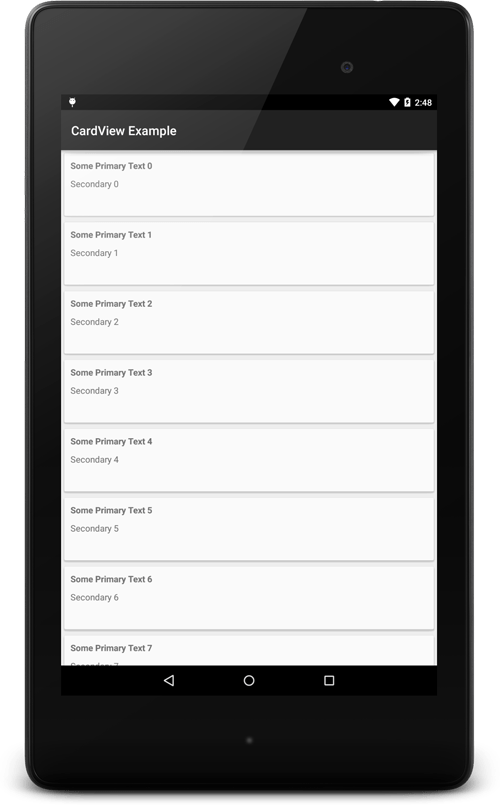
As mentioned in the opening lines of this tutorial, recently an update to support v7 library was released. This update deprecated an important method called getPosition(). This method was used to return the position of view holder item. But now two new methods, getlayoutPosition() and getadapterPosition() are introduced instead of it. These methods return the position of layout in view holder and adapter position, respectively. The later one gives the position basis on the items currently in the adapter. For better understanding, please have a look at the full source code below:
Also in the above adapter class you may see that in onCreateViewHolder method, the card_view_row is used to inflate the CardView for a RecyclerView list. Also you may observe that in this example of Android CardView, a custom on item click listener is used. This listener is used to capture the onClick event of the CardView. It is used in such a way to simplify the code. But this can be used to detect clicks of the specific views inside CardView. Just like the Google app, we can define buttons inside the card, and detect it clicks. Hope this Android CardView Tutorial helped you understand the working of CardView and RecyclerView better. Connect with us through Google+, Facebook, and Twitter for more updates.
Born in New Delhi, India. A software engineer by profession, an android enthusiast and an evangelist. My motive here is to create a group of skilled developers, who can develop something new and good. Reason being programming is my passion, and also it feels good to make a device do something you want. In a very short span of time professionally I have worked with many tech firms. As of now too, I am employed as a senior engineer in a leading tech company. In total I may have worked on more than 20 projects professionally, and whenever I get spare time I share my thoughts here at Truiton.

hi in line 29 of your cardViewActivity.java file you have used
new MyRecyclerViewAdapter(getDataSet());. Is this an inbuilt method coz i do not see where it was first declared.Hi Ian,
This is a custom method I defined in the same class to generate some random data. Its declaration is right below the
onResumemethod ofCardViewActivity. Hope this helps.Hi,
I am trying to exchange the two text boxes for a Button. In each CardView, I’d like to make an OnClickListener for the button that creates a Toast notification with the index of the Card.
The problem is that the only place I seem to have access to the button(s) is through the MyRecyclerViewAdapter class. But there, I have no context and therefor can’t make a Toast.
How do I solve this?
Thanks very much!
Hi,
Can we use CardView just like ImageView without RecyclerView to show a single item? I just want to show a single Card with static data (say an image) and upon clicking it will show message ‘Card Clicked’. Is it possible at all?
Hi,
Yes you can use CardView like a single item to show static data, without RecyclerView as well.
-Mohit
Hey Dude,
I just want to know how to get instance and handle multiple button inside card view and perform different actions on button clicks.
Thanks. Nice article.
Nice Post dude .I want to ask how to make gridview and viewpager?
On Word !
Superb…………..
Hi i need help about getmText1 , I can get the text of the item in the onClick with this method ” getmText1 ” as the position?
thank you soo much.can i add imageView on top of the 2 textviews? and set its attribute to its URL?
Thanks for the tutorial.. Cheers
Can you please give the android studio project for this tutorial ?
hello
i want to implement this cardview in grid mode how that possible ..
thank you..
Yes it is possible. Use
GridLayoutManager.this is nice, in fact very nice. i need help in changing the background color of each card per the data in dataset. how can i achieve this?
change the background color in
onBindViewHolder()method.in the the card view row the linear layout height should be wrap content, otherwise a lot of spacing comes between multiple card views.
Thx very much…. you save me 😀
Thanx Kaveesh, you just saved my Day!!!!!!
Nuce Post bro!!!! awsome… thanks a ton!!!
How can i launch a new activity for each card item
Hi Emma ..
go in CardViewActivity see in onResume .
((MyRecyclerViewAdapter) mAdapter).setOnItemClickListener(new MyRecyclerViewAdapter
.MyClickListener() {
@Override
public void onItemClick(int position, View v) {
Log.i(LOG_TAG, ” Clicked on Item ” + position);
startActivity(new Intent(CardViewActivity.this,YourActivityName.class));
}
});
Thanks for sharing your knowledge with everyone, I wanted to ask how I can place a spinner in a recyclcerview, you have some tutorial or link about this, you appreciate too.
Hi i am getting some problem on the scrolling my cards been seperating i am getting only the one card per page what was that error
Hi,
Added a
wrap_contentin theLinearLayoutof card_view_row.xml. Post updated, please check.-Mohit
Thanks it will works fine
Nice tutorial, I want to add items to the arraylist in an efficent manner, how can I do that?
How can I add an image in the card view list
How to add a search option for card views?
Hii mohit im trying to make a news app with cardview.when i click a card i want it to change its color(which act as mark as read tag) so i implemented is activated method but its only changing color of card for only a sec when i touch it.can you please guide me how to do it properly?
How to implement ‘add to favourites ‘ this option like ♥ heart shape
How can I show lates item to the top like if elelment in array is 20 like {1,2,3,4…..20} then How can I show 20 in the top
hi, im newbie, how to change each text2 into different text ???
ex :
1. food
2. drink
3. etc
thx…