
A very interesting feature introduced in android is speech recognition. Many apps like Google Now, Chrome browser app, Google Maps app use speech recognition for their text input. Most of the apps use the standard easy way to get the voice inputs i.e. startActivityForResult by a RecognizerIntent. This would launch a dialog on top of the app listen to voice input and would return the text back to the app. Now in this tutorial Android Speech Recognition Without Dialog in a Custom Activity, I would show how to do the speech recognition in android without this dialog box.
Recently I was working on an app where I wanted voice to text input, but I did not wanted to show the Google’s pre made voice input dialog. Another way of doing this is by using the IME voice input, i.e the speech recognition from the keyboard. All you need to do is enable this option from the “Language & Input” device settings. But in Android Speech Recognition Without Dialog is possible by one more method, that is to implement the RecognitionListener and override all of its callback methods. This way, one would be able to recognize speech without going to the Google’s original speech recognition dialog.
A drawback of Android Speech Recognition Without Dialog in a Custom Activity is that, we would also have to override the onRmsChanged callback method if we need to show the voice visualization while recording. In this tutorial I have used the standard android ProgressBar to show the voice levels.
To start of with Android Speech Recognition Without Dialog tutorial lets first define the permissions in the android manifest:
<?xml version="1.0" encoding="utf-8"?>
<manifest package="com.truiton.customspeechrecognizer"
          xmlns:android="http://schemas.android.com/apk/res/android">

    <uses-permission android:name="android.permission.INTERNET"/>
    <uses-permission android:name="android.permission.RECORD_AUDIO"/>

    <application
        android:allowBackup="true"
        android:icon="@mipmap/ic_launcher"
        android:label="@string/app_name"
        android:roundIcon="@mipmap/ic_launcher_round"
        android:supportsRtl="true"
        android:theme="@style/AppTheme">
        <activity android:name=".VoiceRecognitionActivity">
            <intent-filter>
                <action android:name="android.intent.action.MAIN"/>

                <category android:name="android.intent.category.LAUNCHER"/>
            </intent-filter>
        </activity>
    </application>

</manifest>
To use the SpeechRecognizer class which provides the access to speech recognition service we need to declare the android.permission.RECORD_AUDIO permission. Next lets have a look at the layout xml file activity_main.xml.
<?xml version="1.0" encoding="utf-8"?>
<RelativeLayout xmlns:android="http://schemas.android.com/apk/res/android"
android:layout_width="match_parent"
android:layout_height="match_parent"
android:orientation="vertical" >
<ImageView
android:id="@+id/imageView1"
android:layout_width="wrap_content"
android:layout_height="wrap_content"
android:layout_alignParentBottom="true"
android:layout_centerHorizontal="true"
android:src="@drawable/truiton" />
<ProgressBar
android:id="@+id/progressBar1"
style="?android:attr/progressBarStyleHorizontal"
android:layout_width="match_parent"
android:layout_height="wrap_content"
android:layout_alignParentLeft="true"
android:layout_below="@+id/toggleButton1"
android:layout_marginTop="28dp"
android:paddingLeft="10dp"
android:paddingRight="10dp" />
<TextView
android:id="@+id/textView1"
android:layout_width="wrap_content"
android:layout_height="wrap_content"
android:layout_below="@+id/progressBar1"
android:layout_centerHorizontal="true"
android:layout_marginTop="47dp" />
<ToggleButton
android:id="@+id/toggleButton1"
android:layout_width="wrap_content"
android:layout_height="wrap_content"
android:layout_alignParentTop="true"
android:layout_centerHorizontal="true"
android:layout_marginTop="26dp"
android:text="ToggleButton" />
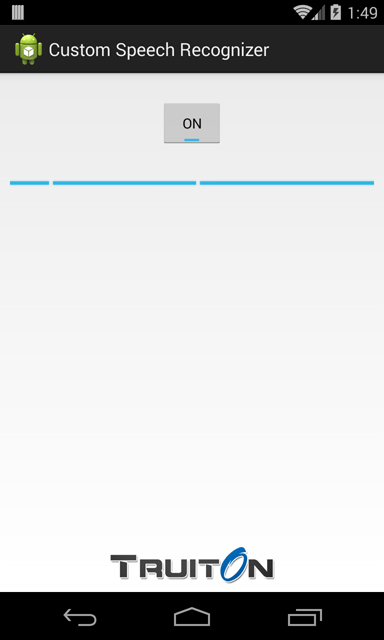
</RelativeLayout>The key elements in this layout file are a ToggleButton, ProgressBar, and a TextView. In this layout the TextView would be used to display the results, ToggleButton would be used to start and stop the SpeechRecognizer API. Lastly the ProgressBar would be used to display the speech RMS fluctuations. In the end your layout would look something like this one below.

Lets move on to some real code now, but before that let me give you a little overview of RecognitionListener, RecognizerIntent, and SpeechRecognizer in android. Also how they work together in Android Speech Recognition Without Dialog in a Custom Activity tutorial. In Android there are two ways of speech recognition:
1. Start an activity for result, with an Intent that has some parameters:
Intent intent = new Intent(RecognizerIntent.ACTION_RECOGNIZE_SPEECH);
intent.putExtra(RecognizerIntent.EXTRA_LANGUAGE_MODEL, "en-US");
startActivityForResult(intent, RESULT_SPEECH);
This would launch a dialog on top of your activity and would start capturing voice. When its done it returns the text back to your activity.
2. The second way is the one where we implement the RecognitionListener and implement all of its call back methods. This Android Speech Recognition Without Dialog tutorial focuses mainly on this second part. Another interesting feature about speech recognition is that since jellybean OS has bean released you can also do an offline voice recognition, all you need to do is download a language pack from settings.
Offline Speech Recognition In Android
- Goto “Language & input” in settings
- Tap on “Voice Search”
- Tap on “Offline speech recognition”
- Select and download the desired package
Now lets have a look at the main class VoiceRecognitionActivity.java:
package com.truiton.customspeechrecognizer;

import android.Manifest;
import android.content.Intent;
import android.content.pm.PackageManager;
import android.os.Bundle;
import android.speech.RecognitionListener;
import android.speech.RecognizerIntent;
import android.speech.SpeechRecognizer;
import android.support.annotation.NonNull;
import android.support.v4.app.ActivityCompat;
import android.support.v7.app.AppCompatActivity;
import android.util.Log;
import android.view.View;
import android.widget.CompoundButton;
import android.widget.ProgressBar;
import android.widget.TextView;
import android.widget.Toast;
import android.widget.ToggleButton;

import java.util.ArrayList;

public class VoiceRecognitionActivity extends AppCompatActivity implements
        RecognitionListener {

    private static final int REQUEST_RECORD_PERMISSION = 100;
    private TextView returnedText;
    private ToggleButton toggleButton;
    private ProgressBar progressBar;
    private SpeechRecognizer speech = null;
    private Intent recognizerIntent;
    private String LOG_TAG = "VoiceRecognitionActivity";

    @Override
    protected void onCreate(Bundle savedInstanceState) {
        super.onCreate(savedInstanceState);
        setContentView(R.layout.activity_main);
        returnedText = (TextView) findViewById(R.id.textView1);
        progressBar = (ProgressBar) findViewById(R.id.progressBar1);
        toggleButton = (ToggleButton) findViewById(R.id.toggleButton1);


        progressBar.setVisibility(View.INVISIBLE);
        speech = SpeechRecognizer.createSpeechRecognizer(this);
        Log.i(LOG_TAG, "isRecognitionAvailable: " + SpeechRecognizer.isRecognitionAvailable(this));
        speech.setRecognitionListener(this);
        recognizerIntent = new Intent(RecognizerIntent.ACTION_RECOGNIZE_SPEECH);
        recognizerIntent.putExtra(RecognizerIntent.EXTRA_LANGUAGE_PREFERENCE,
                "en");
        recognizerIntent.putExtra(RecognizerIntent.EXTRA_LANGUAGE_MODEL,
                RecognizerIntent.LANGUAGE_MODEL_FREE_FORM);
        recognizerIntent.putExtra(RecognizerIntent.EXTRA_MAX_RESULTS, 3);

        toggleButton.setOnCheckedChangeListener(new CompoundButton.OnCheckedChangeListener() {

            @Override
            public void onCheckedChanged(CompoundButton buttonView,
                                         boolean isChecked) {
                if (isChecked) {
                    progressBar.setVisibility(View.VISIBLE);
                    progressBar.setIndeterminate(true);
                    ActivityCompat.requestPermissions
                            (VoiceRecognitionActivity.this,
                                    new String[]{Manifest.permission.RECORD_AUDIO},
                                    REQUEST_RECORD_PERMISSION);
                } else {
                    progressBar.setIndeterminate(false);
                    progressBar.setVisibility(View.INVISIBLE);
                    speech.stopListening();
                }
            }
        });

    }

    @Override
    public void onRequestPermissionsResult(int requestCode, @NonNull String[] permissions, @NonNull int[] grantResults) {
        super.onRequestPermissionsResult(requestCode, permissions, grantResults);
        switch (requestCode) {
            case REQUEST_RECORD_PERMISSION:
                if (grantResults.length > 0 && grantResults[0] == PackageManager.PERMISSION_GRANTED) {
                    speech.startListening(recognizerIntent);
                } else {
                    Toast.makeText(VoiceRecognitionActivity.this, "Permission Denied!", Toast
                            .LENGTH_SHORT).show();
                }
        }
    }

    @Override
    public void onResume() {
        super.onResume();
    }

    @Override
    protected void onPause() {
        super.onPause();

    }

    @Override
    protected void onStop() {
        super.onStop();
        if (speech != null) {
            speech.destroy();
            Log.i(LOG_TAG, "destroy");
        }
    }


    @Override
    public void onBeginningOfSpeech() {
        Log.i(LOG_TAG, "onBeginningOfSpeech");
        progressBar.setIndeterminate(false);
        progressBar.setMax(10);
    }

    @Override
    public void onBufferReceived(byte[] buffer) {
        Log.i(LOG_TAG, "onBufferReceived: " + buffer);
    }

    @Override
    public void onEndOfSpeech() {
        Log.i(LOG_TAG, "onEndOfSpeech");
        progressBar.setIndeterminate(true);
        toggleButton.setChecked(false);
    }

    @Override
    public void onError(int errorCode) {
        String errorMessage = getErrorText(errorCode);
        Log.d(LOG_TAG, "FAILED " + errorMessage);
        returnedText.setText(errorMessage);
        toggleButton.setChecked(false);
    }

    @Override
    public void onEvent(int arg0, Bundle arg1) {
        Log.i(LOG_TAG, "onEvent");
    }

    @Override
    public void onPartialResults(Bundle arg0) {
        Log.i(LOG_TAG, "onPartialResults");
    }

    @Override
    public void onReadyForSpeech(Bundle arg0) {
        Log.i(LOG_TAG, "onReadyForSpeech");
    }

    @Override
    public void onResults(Bundle results) {
        Log.i(LOG_TAG, "onResults");
        ArrayList<String> matches = results
                .getStringArrayList(SpeechRecognizer.RESULTS_RECOGNITION);
        String text = "";
        for (String result : matches)
            text += result + "\n";

        returnedText.setText(text);
    }

    @Override
    public void onRmsChanged(float rmsdB) {
        Log.i(LOG_TAG, "onRmsChanged: " + rmsdB);
        progressBar.setProgress((int) rmsdB);
    }

    public static String getErrorText(int errorCode) {
        String message;
        switch (errorCode) {
            case SpeechRecognizer.ERROR_AUDIO:
                message = "Audio recording error";
                break;
            case SpeechRecognizer.ERROR_CLIENT:
                message = "Client side error";
                break;
            case SpeechRecognizer.ERROR_INSUFFICIENT_PERMISSIONS:
                message = "Insufficient permissions";
                break;
            case SpeechRecognizer.ERROR_NETWORK:
                message = "Network error";
                break;
            case SpeechRecognizer.ERROR_NETWORK_TIMEOUT:
                message = "Network timeout";
                break;
            case SpeechRecognizer.ERROR_NO_MATCH:
                message = "No match";
                break;
            case SpeechRecognizer.ERROR_RECOGNIZER_BUSY:
                message = "RecognitionService busy";
                break;
            case SpeechRecognizer.ERROR_SERVER:
                message = "error from server";
                break;
            case SpeechRecognizer.ERROR_SPEECH_TIMEOUT:
                message = "No speech input";
                break;
            default:
                message = "Didn't understand, please try again.";
                break;
        }
        return message;
    }
}
The main purpose of implementing this Android RecognitionListener interface is to do the speech recognition without displaying the Android/Google’s speech recognition dialog. lets start with onCreate method, here SpeechRecognizer.createSpeechRecognizer(this); is used to initialize the SpeechRecognizer object. This Android SpeechRecognizer class is the one through which one can access the speech recognition service. This object is the main object in this implementation through which we start and stop the voice recognition process.
Another important thing which I skipped in the beginning was the display of speech visualization. Generally when working with default Google’s Voice Search dialog, while the voice is being captured a visualization is displayed around the mic button. But now that we are implementing our own activity where voice will be captured, we also need to implement a voice visualization. This is done through the onRmsChanged(float rmsdB) method. An interesting observation about this method is that rmsdB is always between the range of -2.~ to 10.0, this is not stated anywhere in the official documentation, its just my personal observation. Also when I searched the net found someone here saying this. Therefore in the onBeginningOfSpeech() method I have set the max value of progress bar to 10. In the standard flow of RecognitionListener whenever voice fluctuations are observed the rmsdB is changed, and onRmsChanged method is called. In this implementation I use this method to update the progress bar. I would like to state that I have used this progress bar in this Android Speech Recognition Without Dialog in a Custom Activity tutorial for the sake of simplicity, one can use any sort of complex graphs to show a visualization.
Next when the toggle button is changed SpeechRecognizer.startListening(recognizerIntent); and SpeechRecognizer.stopListening(); methods are called accordingly, with an appropriate RecognizerIntent. After this implementation your app would look something like this:


To see the fully working code sample for this Android voice to text conversion, please visit the link below:
Coming to an end, one of the most important methods to build the Android speech Recognition App Without Pop Up, is onResults(Bundle results) method. Here in this method speech recognition result is passed as an argument in the form of an ArrayList. After this one can process the result, as required. In my case I just displayed it in a TextView. Hope this Android Speech Recognition Without Dialog in a Custom Activity tutorial helped you, if it did, please share this with your friends on Google+, Facebook, and don’t forget to like our Facebook page for updates.
Born in New Delhi, India. A software engineer by profession, an android enthusiast and mobile development evangelist. My motive here is to create a group of skilled engineers, who can build better software. Reason being programming is my passion, and also it feels good to make a device do something you want. Professionally I have worked with many software engineering and product development firms. As of now too, I am employed as a senior engineer in a leading tech company. In total I may have worked on more than 20 projects professionally, but whenever I get spare time I share my thoughts here at Truiton.

hi
thanks for this.
I tried to run this on Google Glass and I got the error 9 permission error.
Do you have any idea why could be the problem ?
Thanks
you need speech.cancel() replace speech.stopListening()
Hi.. I tried this code in an android table(4.0.4). It gives me an error “client side error”. What should I do. Please reply me as soon as possible. I am waiting to create this type of application.. Thank you…
I’m having the same error, have you solved it?
Having the same problem …. got any solution ?
Very good! Congrats!
Hi. Could you tell me if i can make that the recognizer can be execute it by somehow in a thread while he is communicating with the api? because it last the first time like 5 or 8 secs. Thanks for your great post has been very useful for my career project.
Great stuff, helped me
Nice tutorial……
Nice tutorial,thanks for this
This is a very good tutorial, it really help me a lot. Thanks a lot! =)
Hi. I am having some troubles with the recognition feature. It times out while I am still speaking. Do you have any idea on how to solve this? I already tried passing the EXTRA_SPEECH_INPUT_MINIMUM_LENGTH_MILLIS to the intent but it still does not work. Thanks a lot.
HI ,
Can i have the source code for this one ??
Thank You very much.,Working Perfect with modifications
Thanks for this great tutorial!
It worked perfectly on my nexus 5 with android 6.
* For all the android 6 users, you need to grant your compiled a app microphone permission by going to the app settings and enabling it.
The manifest permission is not enough:
1. Long click your app
2. Drag it to “App info” text
3. Click “Permissions”
4. Enable “Microphone”
Good suggestion Rony.
It worked for me.
Thanks a lot, mate. Works like a charm.
can anyone tell me how to use this feature as a background activity in my own activity ??
I mean, how to use this code as service without changing my original layout ??
If u understand that please let me know how.
Hi, I tried this code.
I want to control start and stop record.
Can I use the same code with some modifications ?
Thanks,
Vikas
Thank you for the tutorial!
I tried the code as it is but it is limited in time and I’m not sure why but the togglebutton is triggered after 7 seconds. So I thought about creating a button that would bypass the togglebutton, inserting the startlistening when I click the button. But it doesn’t work at all, then. Any ideas on this behavior.
Hi Bernard
I have got the issues like yours in this tutorial.
So did you solve them? If you have already resolved, please let me know about it.
Thank you.
Hi guys, actually its a problem from google they have a limitation of speech length
thank you very much it is working
Nice example, thank you.
For people wondering ow to modify this, see the documentation:
https://developer.android.com/reference/android/speech/SpeechRecognizer.html
https://developer.android.com/reference/android/speech/RecognizerIntent.html
There’s quite a few options there.
thanks but i have one question :
this is work just for english language
how can i use another language for this?
It’s so nice to come across an Android tutorial that actually makes sense so thanks for that.
Now, the problem that I’m having is that every single Log command is telling me that it’s too long. That it has a max of 23 characters and all of them are showing 24 characters.
I’m using Android Studio 2.2.2 with JRE 1.8.0 64bit.
Any suggestions on how to fix this?
Don’t worry, found it. The LOG_TAG was too long.
How can I run the voice recognition again after the user stop speaking?
Thank you very much, It is working perfectly. This is what I need..
Thanks again!!!
Thank you. I’m developing an app for blind users. Your tutorial helped me so much.
This works for me fine, but after the onEndOfSpeech is triggered, recognition is stopped. I want it to go on until I decide to stop it. The issue is self restart fails one or more times because it says service is un available. Do you know hpw to keep SpeechToText working as long as I want?
Thanks
Exactly what I want.
Please let me know if you find a solution for that.
Is it possible to use android s speech recognition without showing the dialog?
Very useful code here. Thanks. Is there a way to download your code (all files) as a tar or zip file?
Thanks!
That helped me a lot, I’ve rewrote it in C# and it works like a charm!
After a short research and also from an earlier question on this page, I finally got this app to work.
I had to grant permissions for the mic and storage on the phone exactly as described by @Rony Brosh
October 21, 2015 at 3:20 pm in the above commments
Thanks for an wonderful and elegant solution
Cheers!
Thanks for putting in the feedback, article is now updated.
Also the same is now present on github.
Your code has been very useful for developing my application.
I wanted to ask you, how to make listening continuously.
Is it possible?
Thank you
Great job!
There are still loose ends with Google’s api for sure. For instance, the parameters that are supposed to control the silence time before transcribing don’t work (EXTRA_SPEECH_INPUT_COMPLETE_SILENCE_LENGTH_MILLIS).
What I wanted is to let the user stop the transcription by clicking a button.
I can think of a process that after a silence appends the transcription to a string and then calls again the process to keep transcribing.
Do you think this is possible?
Dear Mr Gupt
I have established your code in Android Studio 3 on my Samsung Tablet. It worked with one except. When I changed the int variable for RecognizerIntent.EXTRA_MAX_RESULTS on 3 or 2, the TextView returndedText shows 5 or 4 strings. How can I set the amount of understood RESULTS_RECOGNITION on RecognizerIntent.EXTRA_MAX_RESULTS?
Thank you very much for your help
안녕
나는 이것을 공부하는 학생이야
이소스를 보고 배울수있어서 너무 고마워
정말 고마워 !
항상 행복해
Amazing tutorial. Thank you!